Spill Response: The Seven Critical Steps
When teaching employees to respond to spills, a lot of time is spent sharing tricks of the trade and discussing the details of the equipment commonly used during spill response. However, it is equally important to step back and be confident that employees also understand the proper sequence of responding to spills and how the details of the information being shared with them fit into the larger scope of spill response.
Although each spill response is unique, one can take a series of steps during every response. Sharing these steps with employees can help them understand the sequence of responding to a spill and the precautions they need to take to keep themselves safe before, during and after a response.
Step 1 – Never Assume
Notify others in the area immediately and report the spill to the site supervisor; evacuate the area if the situation warrants it. If necessary, call 911 or follow the specified emergency procedures to call for help. Be sure to tell the dispatcher the type of spilt material so they are ready to address the situation when they are on site. If an injury is involved, make sure they are moved from the contaminated area to a safe place.
Step 2 – Assess Area
The person in charge should identify (to the degree possible) all hazardous substances, the conditions present, handling procedures, the amount of liquid and potential dangers. It is crucial for the responder to “stop, look and listen” before responding. The individual should look at the risks to human health, the environment and property. Consider other potential risks near the spill and eliminate all ignition, heat, or power sources. Shut down any potential heat sources or ignition, if possible (and appropriate) and safely disperse any fumes by increasing ventilation to the area. If the fumes are hazardous, it’s often better to close the doors and windows to isolate the area after the workplace has been evacuated. Remove portable items without coming in contact with the spill.
Step 3 – Identify Spill
Identify the spilled material and determine how much has spilled. Use the container’s label or the Safety Data Sheets (SDS) to identify the liquid and the primary dangers posed to spill responders and the environment.
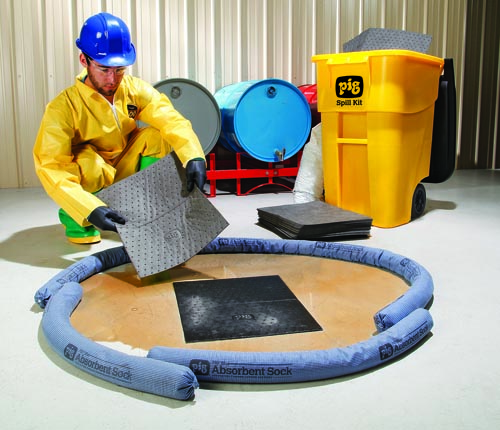
Step 4 – Respond
Once somebody has determined that the spill is not life-threatening and easy to manage, you must protect the clean-up team. Please do so by outfitting your team properly with PPE, (Personal Protective Equipment), including PPE suits (choose the correct level of suit found on the liquids SDS sheet), SCBA-recommended respirators, boots, gloves, and goggles. After the immediate situation has been addressed, prevent the spill from spreading to or contaminating other areas and adjacent surfaces. Once the spilt material and problem have been confined to a small space using some absorbent material or neutralizer, spread those materials around the periphery of the spill to stop it from expanding, and work your way to the centre. If needed, cover all drains, doorways, and areas where spills can escape. Work inward from the outside of the spill, using a circular motion to absorb the spilled material.
Step 5 – Clean-up/Disposal
Stop the spill at its source. You can do this by turning a valve, rolling a drum over or using a leak stopper product. Use spark-proof and chemically compatible equipment to clean up (shovels, brooms, dustpans, etc.). Gather the material used to neutralize or contain the spill and dispose of it in a stipulated way. That may be a plastic bag if the spill is small or plastic pails or drums for larger spills. In some cases, you’ll also need to dispose of any equipment that you used to clean up the material, such as brooms or dustpans. It would be best to place all pads, granular socks, non-reusable gloves, clothing, etc., in a disposal container.
Step 6 – Decontamination
After a spill, the site, personnel, and equipment must be decontaminated. All PPE & equipment must also be thoroughly decontaminated and checked at the site of the spill. Remove the most soiled or contaminated clothing first. Next, rinse off heavily contaminated materials in a contained area. Never touch clean clothing or materials with contaminated gloves. Finally, turn clothing inward to avoid re-contaminating. If articles have been damaged or cannot be thoroughly decontaminated, dispose of them accordingly and replace them with new ones.
Step 7 – Reporting
De-brief all personnel involved, compile a complete incident report, and fill out all associated paperwork. If needed, change your procedures and/or the location of your spill response equipment. Remember to replenish/re-stock all front-line equipment and backup stocks, including PPE, drain covers, etc.
Global Hazmat offers a detailed product, service, and training process that educates organizations about which specific products are suitable for their facility and assists with implementing an effective spill response plan. In addition, we design our assessments to help you outline a swift, effective system for dealing with compliance and existing or possible environmental concerns.
Call us today or contact us online for more information about our spill management consulting and training services or to schedule a consultation and put our experience and expertise to work for your organization.